Managing Assets in ContentCreator
A hands-on guide to the Media Management area in ContentCreator: browse and organize your images and files, let FirstSpirit AI generate alt text and tags, define per-format image resolutions with smart focus areas, crop manually, and see where every asset is used before it goes live.
Overview
Media Management is the part of ContentCreator where all of a project's assets live — photos, graphics, logos, and downloadable files. It is where you upload new media, keep it organized in folders, enrich it with descriptive metadata, and prepare the exact image crops your page layouts need. Because it is built into ContentCreator, everything happens in context: you never leave the editor to manage the pictures your pages depend on.
This guide follows a typical asset workflow end to end:
- Find and browse assets in the media gallery.
- Organize them into folders and bookmark what you use often.
- Generate alternative text and tags with FirstSpirit AI — for one image or a whole folder at once.
- Define image resolutions and pick a focus area so every crop keeps the important part of the picture.
- Check where an asset is used before you change it, then see the result on the live page.
The Media Management interface
Open Media Management from the ContentCreator toolbar. The screen splits into a folder tree on the left and a gallery of the selected folder's assets in the middle, with a tools rail down the right edge.
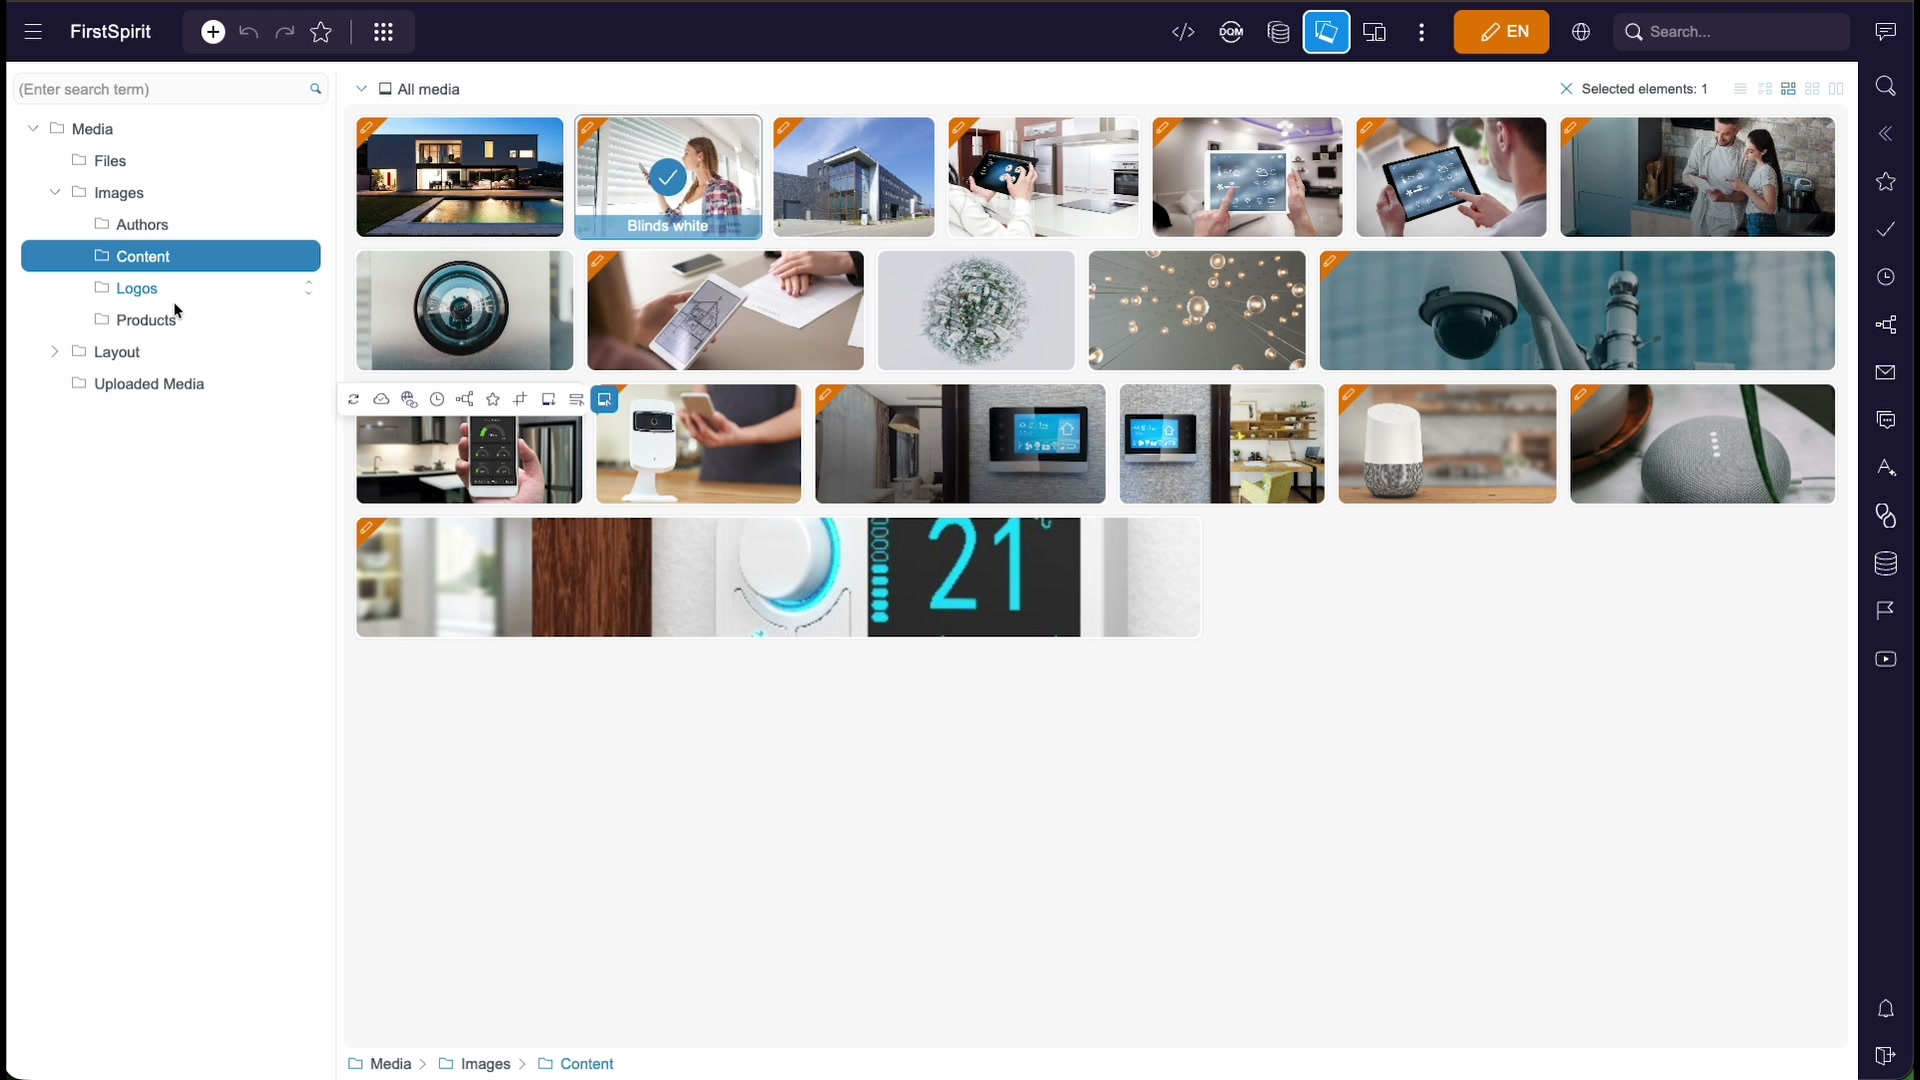
| Area | What it does |
|---|---|
| Search | The Enter search term box at the top of the tree filters assets by name across the media store. |
| Folder tree | The hierarchy of media folders. All media shows everything; click any folder to scope the gallery to it. |
| Gallery | Thumbnails of the current folder. Click to select (the header shows Selected elements: N); hover to reveal a per-asset quick-action toolbar. |
| View modes | The toggles above the gallery switch between list and several grid densities, so you can trade thumbnail size for how many assets fit on screen. |
| Tools rail | Context tools for the current selection — search, bookmarks, tasks, history, and References (see Where assets are used). |
| Breadcrumb | The path at the bottom (e.g. Media › Images › Content) shows where you are and lets you jump back up. |
Folders & organization
Assets are grouped into folders so large libraries stay navigable. In the demo project, for example, images are separated into Authors, Content, Logos, and Products, with separate top-level folders for Files, layout assets, and freshly Uploaded Media.
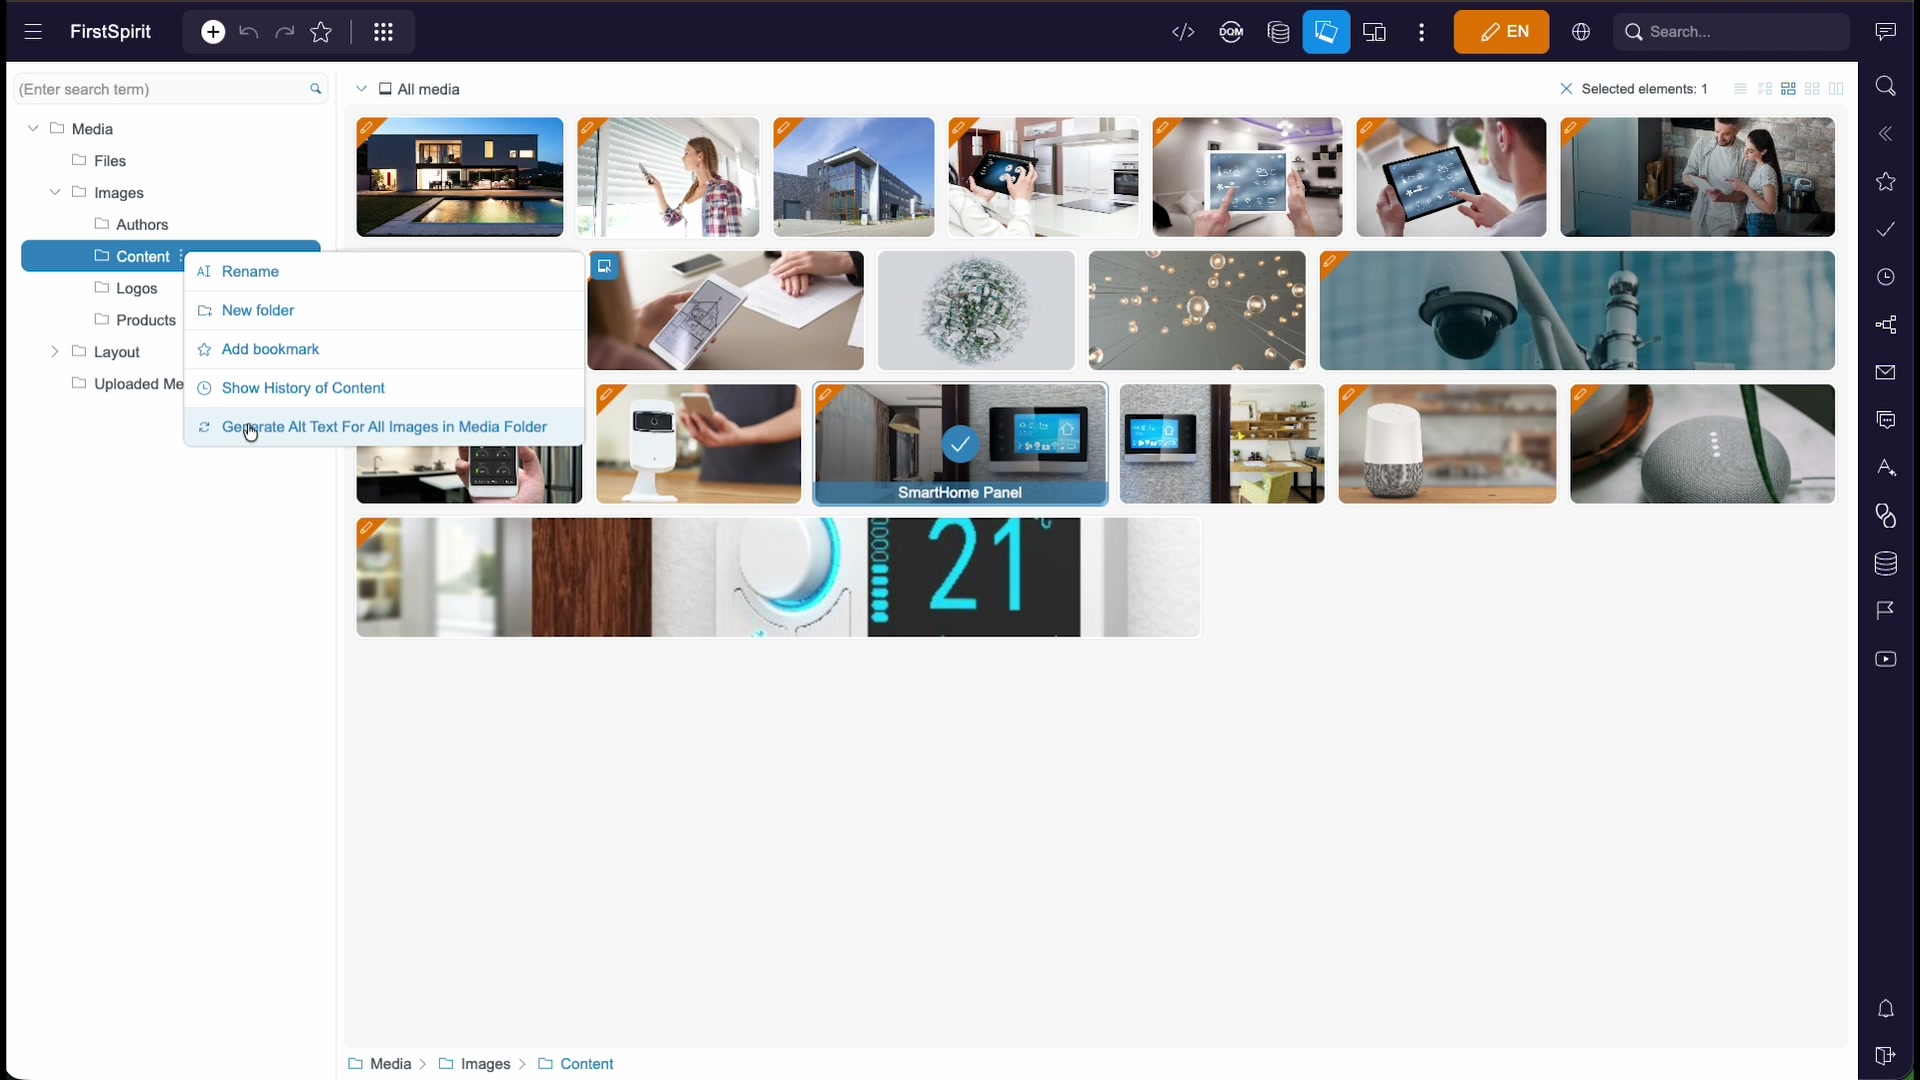
Right-click a folder to reach its actions:
| Action | What it does |
|---|---|
| Rename | Change the folder's name. |
| New folder | Create a sub-folder to organize assets further. |
| Add bookmark | Pin the folder for quick access from the bookmarks rail. |
| Show History | View the change history of the folder and its contents. |
| Generate Alt Text For All Images in Media Folder | Run FirstSpirit AI over every image in the folder to create alternative text in one pass — see AI-assisted metadata. |
Tip: Bookmark the folders you touch most (e.g. your Content images) so they are one click away instead of a tree walk.
AI-assisted metadata
Good metadata makes assets findable and accessible. FirstSpirit AI can generate it for you — both in bulk for a whole folder and individually per image.
Generate alt text for a whole folder
The Generate Alt Text For All Images in Media Folder action on a folder's context menu runs the AI across every image it contains and writes an Alternative Text (AI) value for each one. This is the fastest way to bring an existing, unlabelled library up to an accessible standard without opening each image by hand.
Review and edit metadata per image
To inspect or refine what the AI produced for a single asset, open its Edit Metadata dialog. When metadata has already been generated, the dialog shows Metadata defined. and offers an Erase Metadata button to clear it and start over.
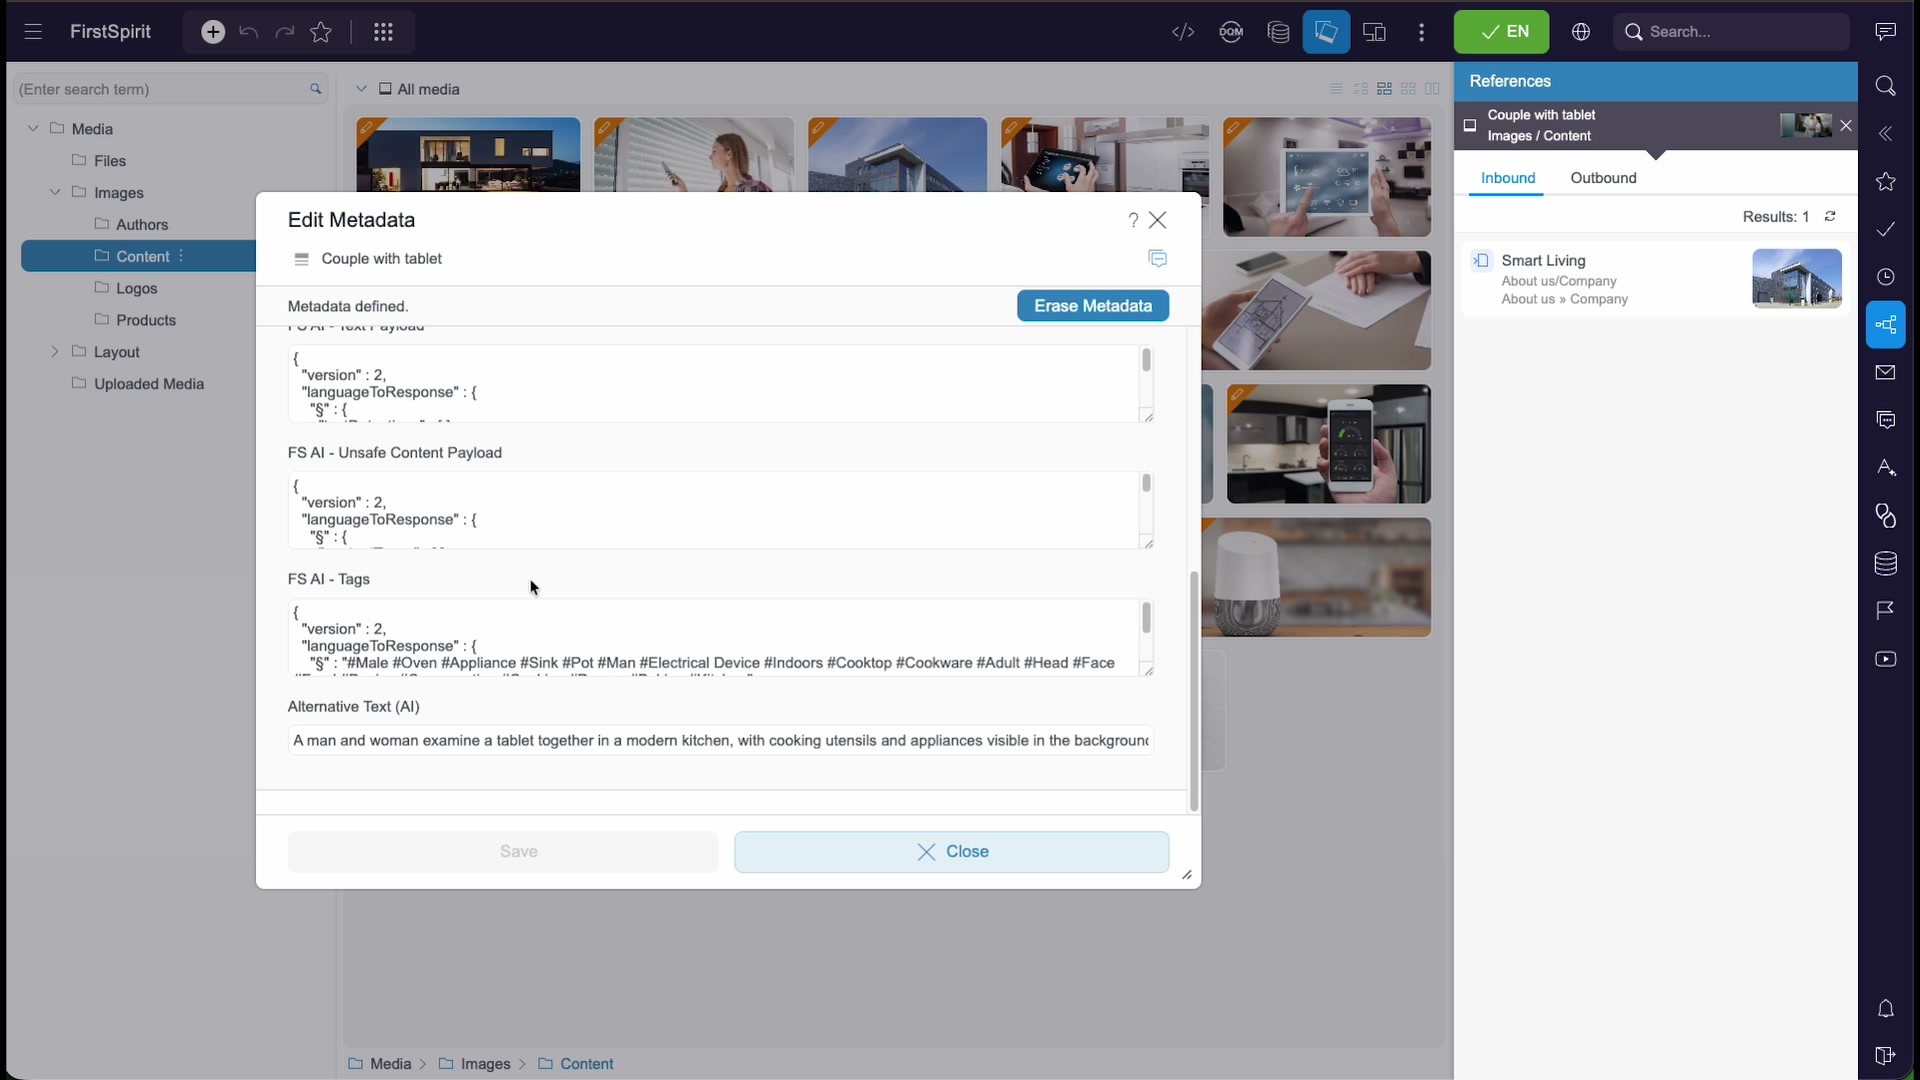
| Field | What it holds |
|---|---|
| Alternative Text (AI) | A human-readable description of the image for accessibility and SEO — e.g. "A man and woman examine a tablet together in a modern kitchen, with cooking utensils and appliances visible in the background." Edit it freely if you want to fine-tune the wording. |
| FS AI – Tags | Keywords the AI detected in the image (for example #Kitchen, #Appliance, #Person, #Cooking), useful for search and classification. |
| FS AI – Unsafe Content Payload | The AI's assessment of whether the image contains sensitive or unsafe content. |
| FS AI – Text Payload | The raw AI response data the other fields are derived from, kept for reference. |
An example of the alternative text the AI generates:
A man and woman examine a tablet together in a modern kitchen,
with cooking utensils and appliances visible in the background.Click Save to keep your changes, or Close to leave the metadata as it is.
Image resolutions
A single source image usually has to appear in many shapes across a site — a wide hero, a square thumbnail, a tall mobile banner. Rather than uploading a separate file for each, ContentCreator derives every shape from one master image through resolutions defined by the project.
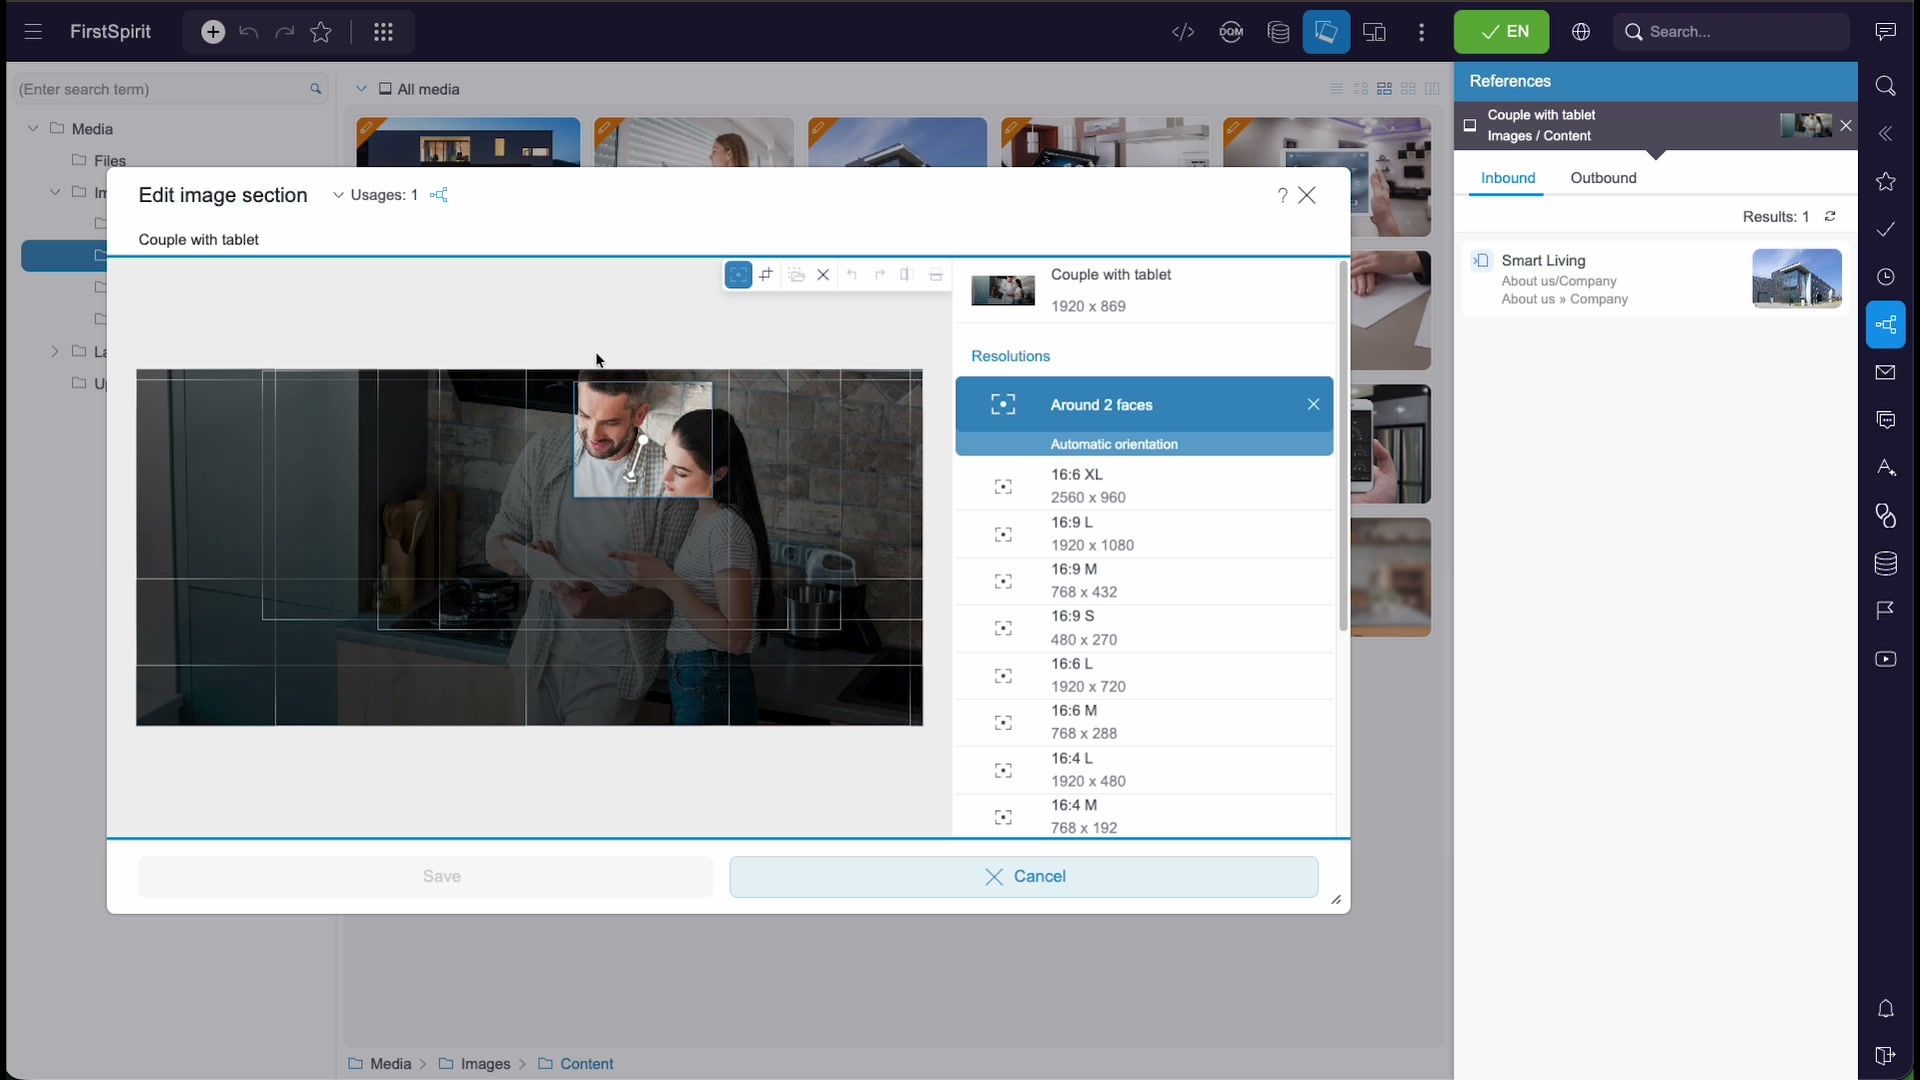
Open an image's Edit image section dialog to see them. The header shows the image name, its native size, and how many times it is currently in use (Usages). The Resolutions list on the right offers one entry per format your templates need.
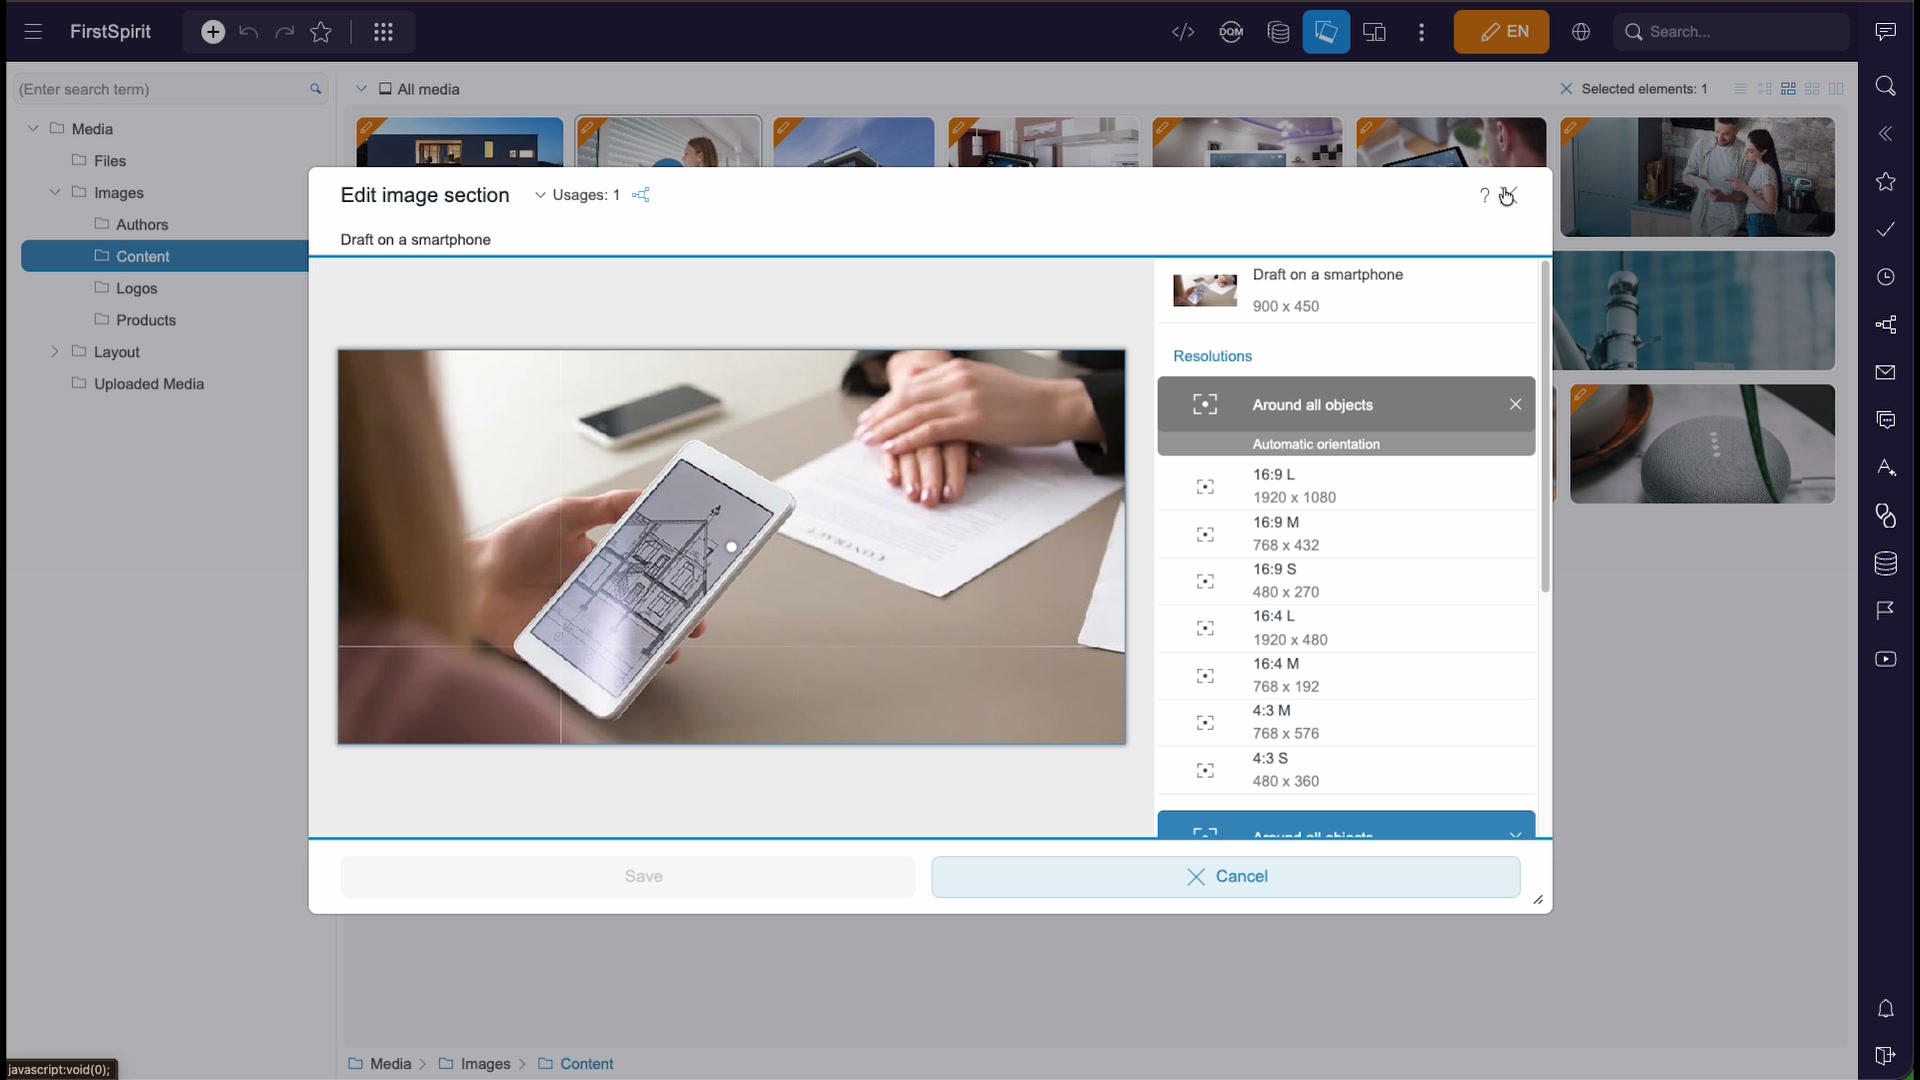
Resolutions are named by aspect ratio and size. In the demo project these include, among others:
| Resolution | Example size |
|---|---|
16:9 L / M / S | 1920×1080, 768×432, 480×270 |
16:6 XL / L / M | 2560×960, 1920×720, 768×288 |
16:4 L / M | 1920×480, 768×192 |
4:3 M / S | 768×576, 480×360 |
9:16 L | 432×768 (portrait / mobile) |
Logo | 212×96 (a fixed size for a specific placement) |
Note: The exact set of resolutions is defined by your project's templates, so what you see will differ from the demo. You crop and focus each one; the layout picks the right resolution automatically wherever the image appears.
Focus areas & orientation
When a wide photo is cropped to a narrow or square format, the interesting part can end up outside the frame. A focus area tells ContentCreator which region to keep, so every derived resolution stays centred on what matters — automatically, without cropping each size by hand.
| Option | What it does |
|---|---|
| Around all objects | Keeps every detected subject in the image inside the crop. |
| Around N faces | AI face detection centres the crop on the detected people — e.g. Around 2 faces for a couple. |
| Choose a focus area | Set the focal point yourself by placing it on the image. |
| Automatic orientation | Lets ContentCreator pick portrait or landscape framing based on the target resolution. |
Pick a focus area once and it applies to all resolutions of that image, so a face or product stays in view whether the image renders as a wide banner or a small square.
Manual cropping
When you need precise control over a specific resolution, switch to Manual cropping. Drag the crop rectangle's handles to frame exactly the region you want for that format.
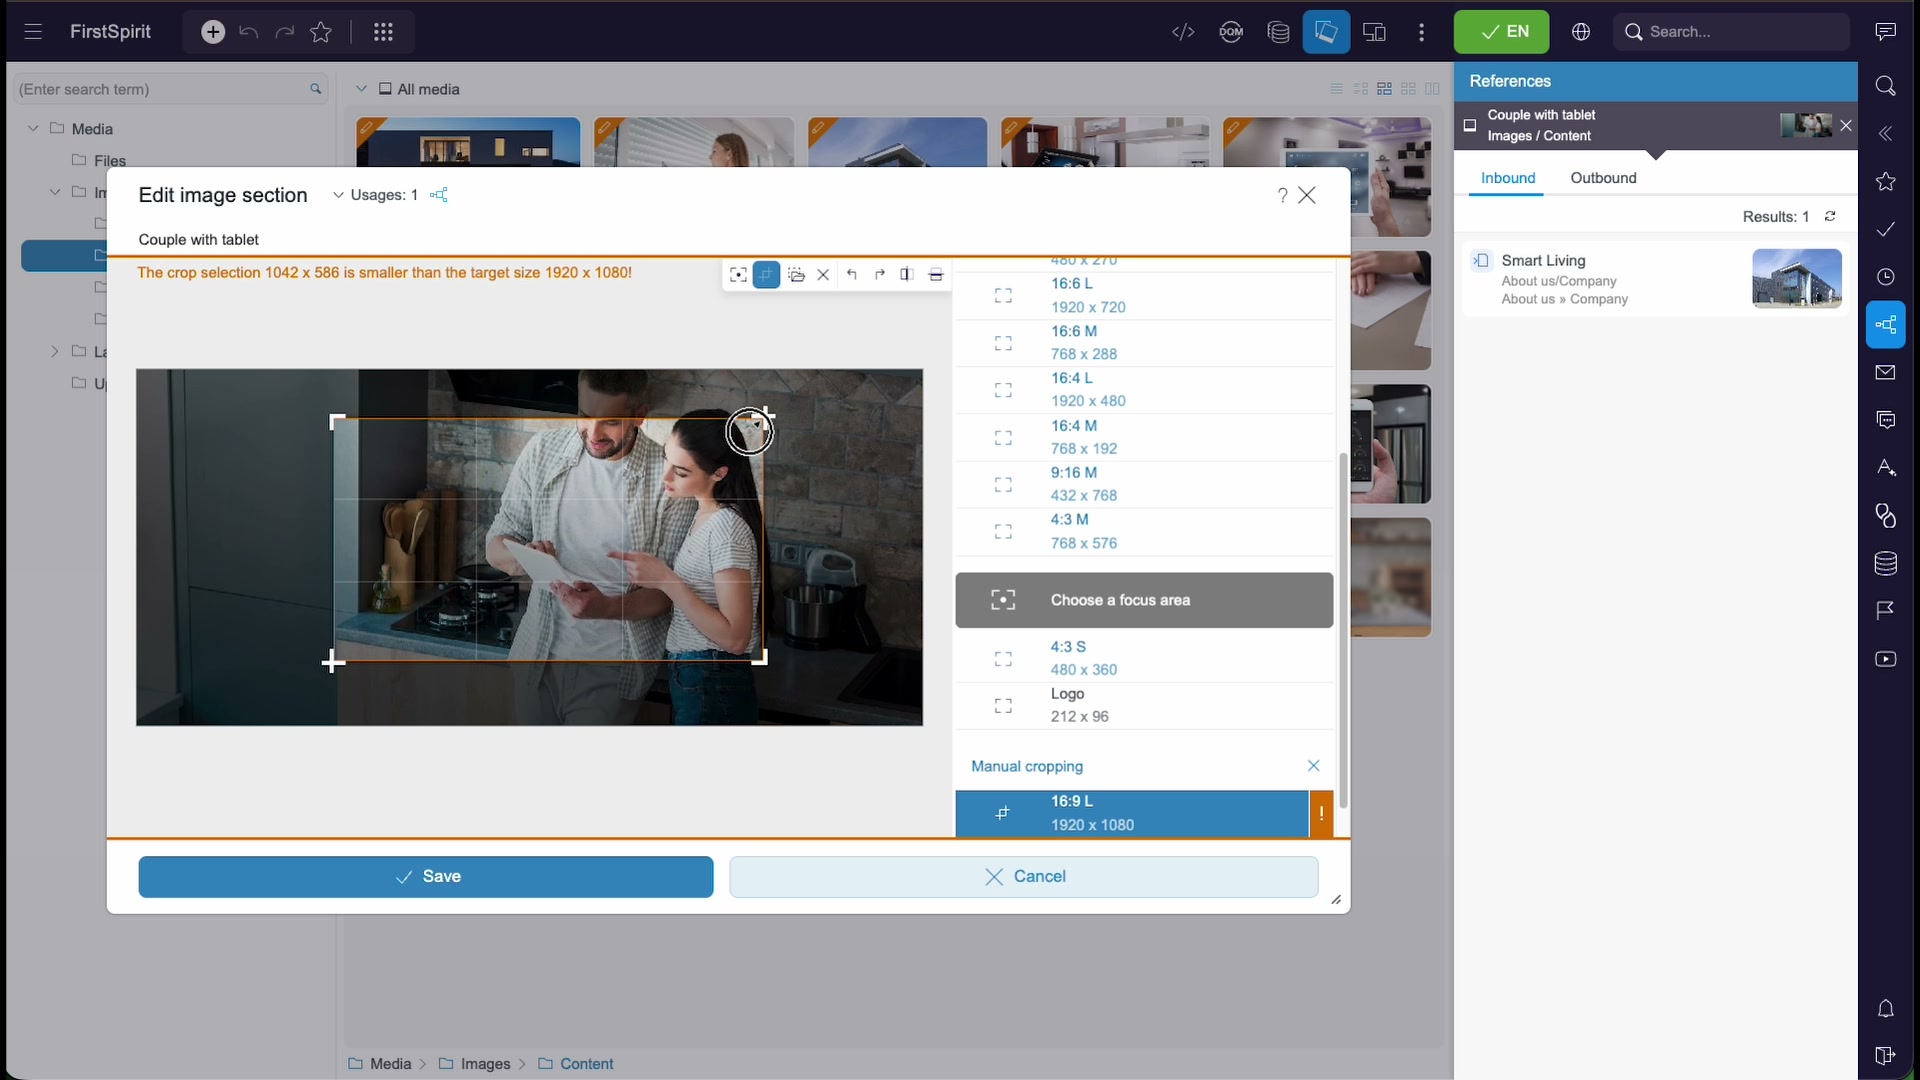
ContentCreator checks your selection against the target size for the resolution. If you select an area smaller than the target, it warns you — because scaling a small crop up to a larger output degrades quality:
To avoid a blurry result, either enlarge your selection so it meets or exceeds the target size, or start from a higher-resolution source image. When the selection is valid, Save becomes available; click it to store the crop, or Cancel to discard your changes.
Where assets are used
Before you re-crop, rename, or delete an asset, it pays to know where it appears. The References panel on the right of the editor answers exactly that, so you never change an image without seeing what it affects.
- Inbound — the pages and sections that use this asset. The panel shows a result count and links straight to each usage (for example a section on an About us › Company page).
- Outbound — other elements this asset refers to.
Click a reference to jump directly to that page, so you can preview the change in context before committing to it.
On the live page
Everything managed in Media Management surfaces on the pages that use it. Once an image has the right resolution, focus area, and alternative text, ContentCreator renders it into the layout — cropped to the correct shape and described for accessibility — exactly where the template places it.
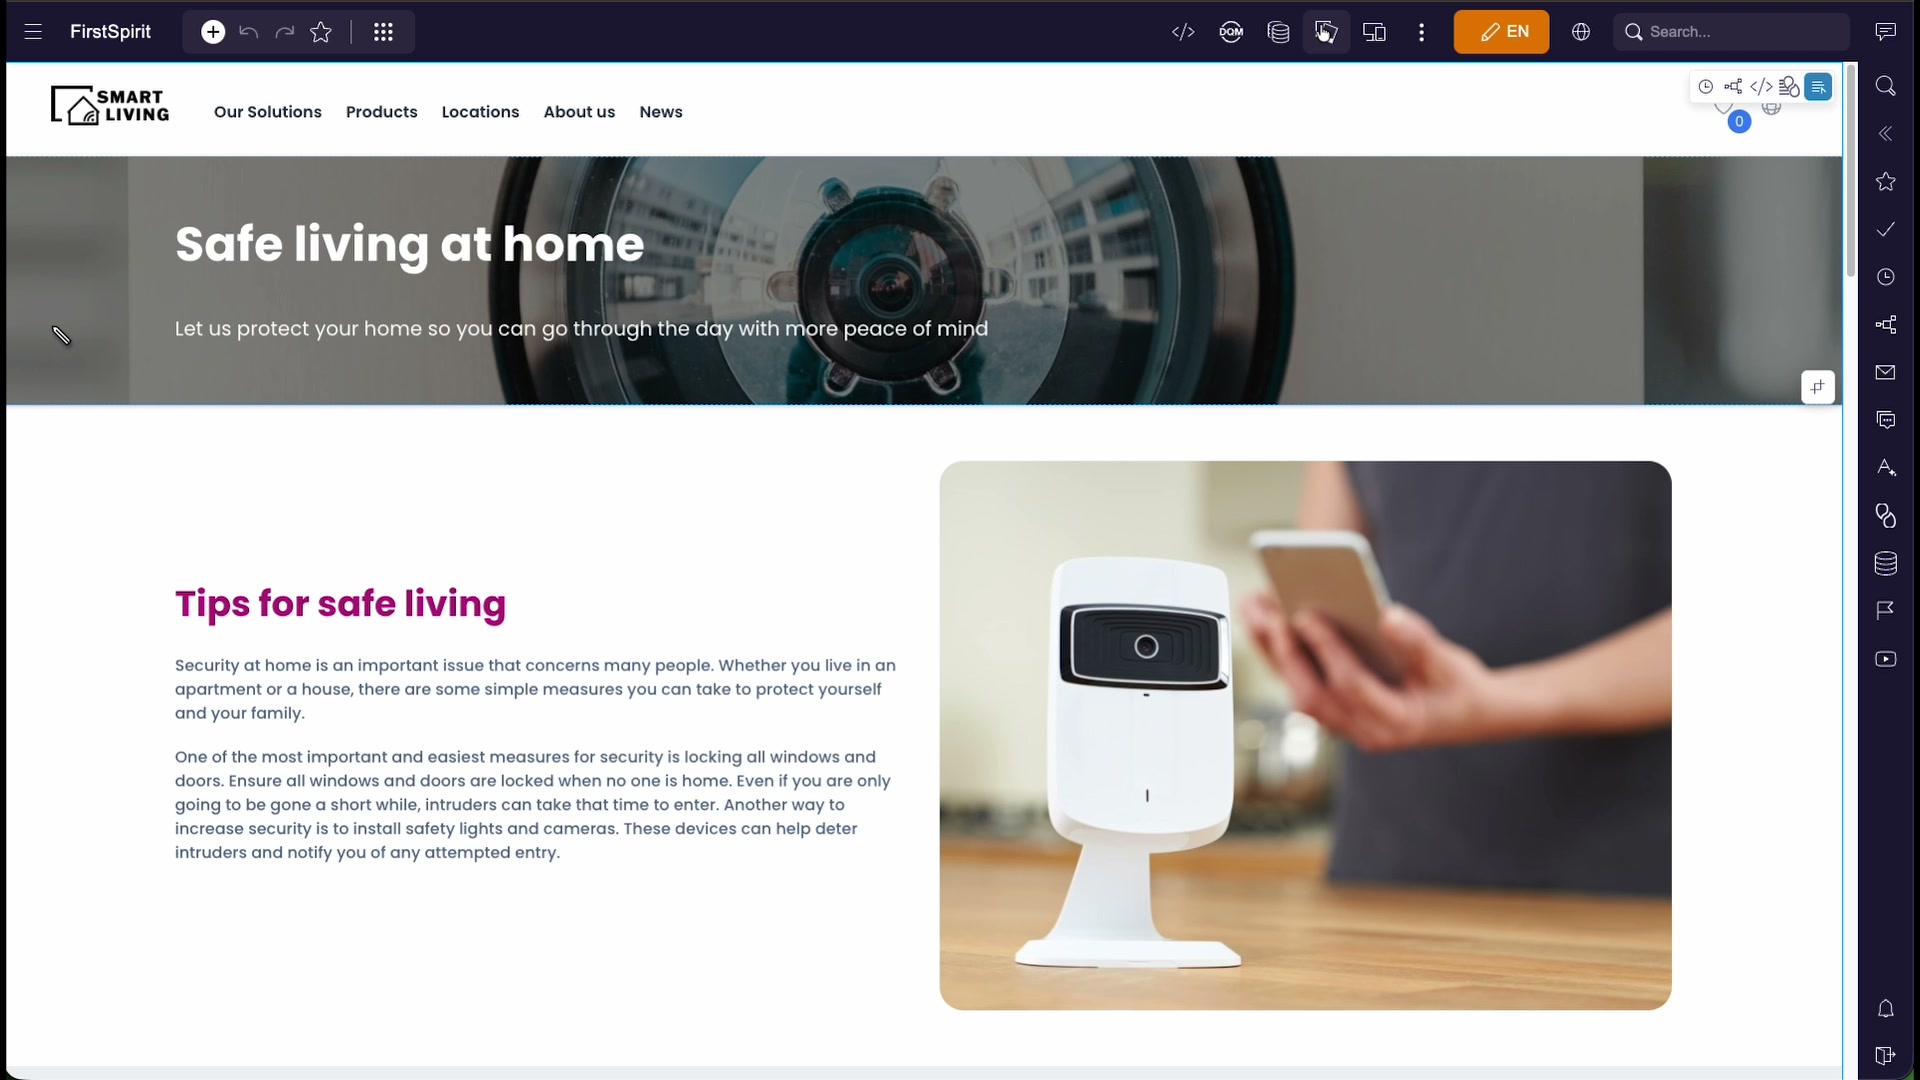
Because Media Management, cropping, and metadata all live inside ContentCreator, the loop stays tight: adjust an asset, check its references, and preview the result on the page — all without leaving the editor.